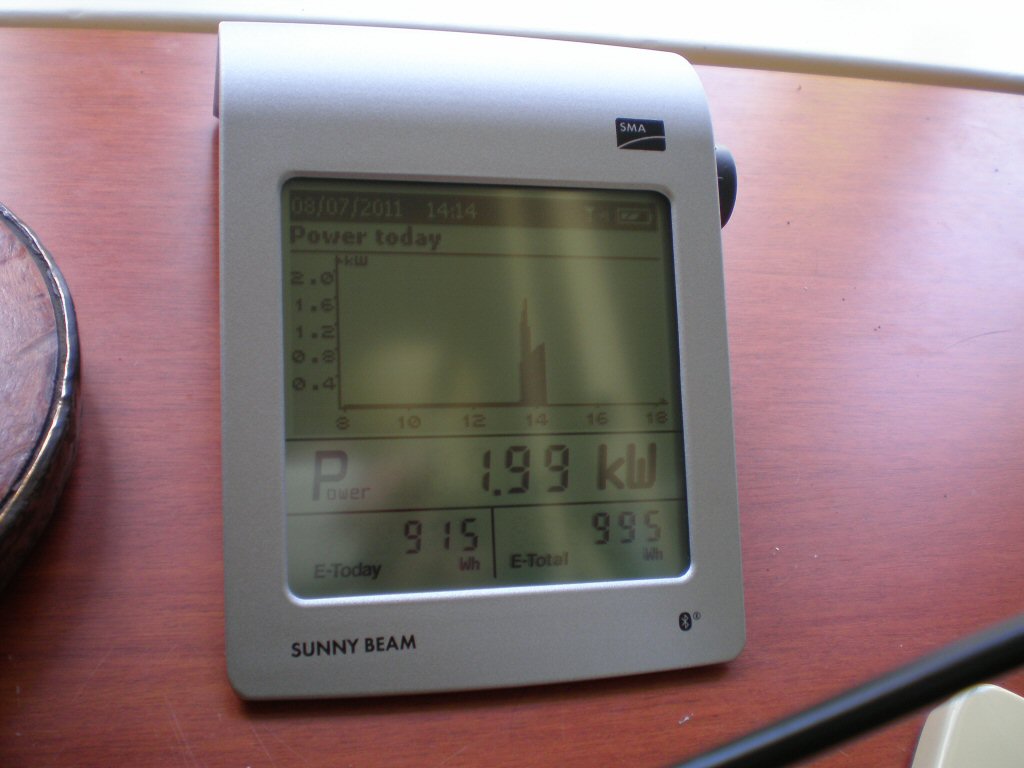
So the solar guys have finished and gone today. I now am the proud owner of my own little ground-mounted photovoltaic power plant. Check out the remote monitoring gadget for proof it actually works:

That gadget is the bluetooth-enabled sunny beam monitor that wireleslly connects to the inverter and lets you monitor output. Cunningly, it has built in solar panels itself, for power :D It also has a usb cable for you to power it, or to dump the historical data to a PC as a csv file.
Here is my ‘what I learned so far’:
Ground mount panels are BIG. They don’t look big on a roof, but stick 10 panels (roughly 2KW) on frames in your garden/driveway and you will be surprised how big they are. This isn’t something you want to do in a small suburban garden. We are lucky in that the drive for our house is unusually big and empty, looking more like a car park than a normal driveway, so we still have lots of room left. They need a lot of space between rows of panels too.
Planning permission for solar with a listed building is HELL. Either pay a company to do get the permission for you, to save yourself the hassle, or start the process a year in advance and prepare for stress. This varies by local council, and if your house isn’t listed, and they go on the roof, AFAIK you dodge needing this permission entirely. Lucky you :D
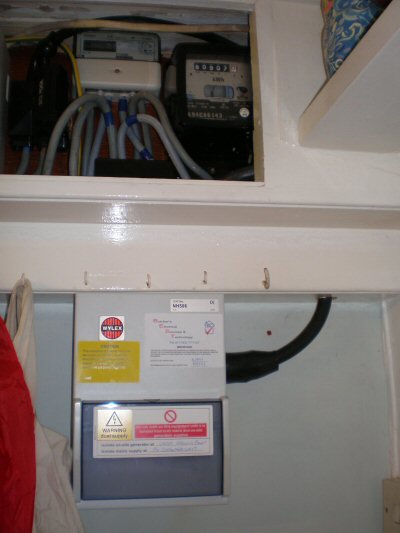
There will be a lot of extra hardware installed by your electricity meter/fusebox. You get a new (tiny) generation meter (middle top of picture), plus a new fusebox gadget (bottom of picture, with big phat AC cable coming into it from the inverter), and another little black box thing (under the generation meter, stuffed with big cables). Don’t assume it will all fit in a tiny space in a cupboard somewhere. We ran out of room and needed the fusebox gadget attached below. I’ll probably get it boxed in one day to look less industrial.

Prices are dropping big-time. My roughly £10k install was £11k just 9 months ago. If you got a quote for PV a year or two ago, get a new one. The panels are getting much cheaper.
Get panels with bypass-diodes. They are more expensive, but worth it. Mine are Schuco. With Bypass Diodes, shading on 1 panel means 1 panel generates zero. Without them, shading on one panel would mean all ten generate zero. This is a BIG deal. Don’t get them without bypass diodes unless you have a south facing roof in the sahara and no trees for miles. Not all panels are the same.
It’s very very cool to have lots of electrical stuff running and your electricity meter not moving. Especially on the day we hear there is another 16% rise in electricity prices. bwahahahaha. I’ll be contacting my electricity company soon to get a new meter fitted which can handle being supplied to. Sadly mine wasn’t one which spun backwards :(
You get a dedicated generation-meter which you have to manually read and report in order to be paid the feed-in-tariff (43p / unit). Entirely seperate to that is an agreement with the electric co that you get credited as exporting 50% of what you produce (extra 3p per unit). This is great,because I will use everything I produce and export bugger-all, so it’s free money :D. This happens because the electric co can’t be assed to install proper export meters.
Lots of boring generation stats to blog over the next few weeks, I’m sure :D. Already earned £1.50 yay!
Now back to programming stuff that explodes.